Guide to configuring your own custom CDN using Cloudfront and WP Fastest Cache
After using WP Fastest Cache on a few websites for a while now, I’m happy to say it has really increased the overall speed and performance of my WordPress websites, I would highly recommend using this plugin with your WordPress site and start seeing the benefits using caching. Even with the use of caching there is still some room for improvement such as, utilizing a content delivery network for loading static content, like images, Javascript, CSS and more. Luckily the folks at WP Fastest Cache have made integration with your favorite CDN service simple.
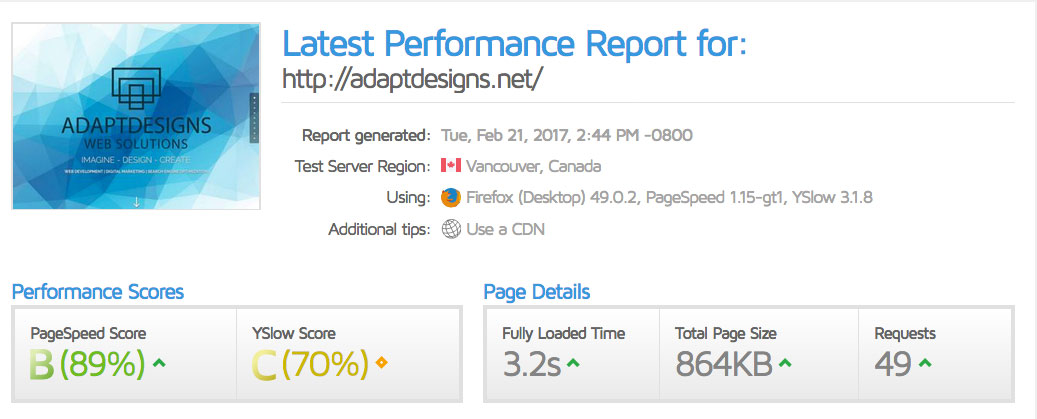
Performance results before using the plugin or CDN
After searching for a while about how to setup a Content Delivery Network using Amazon Cloudfront with WP Fastest Cache and coming back empty handed, I decided to create this guide for others out there who might be in the same position. I hope this guide will help save you some time, money and really boost your website’s performance.
Many of you probably already know about free or premium CDN services offered through Cloudflare, I’ve been using the free service from Cloudflare on a few sites already, but wanted to utilize Cloudfront CDN services provided through Amazon Web Services.
You might be asking why switch from a free CDN to a paid CDN service?
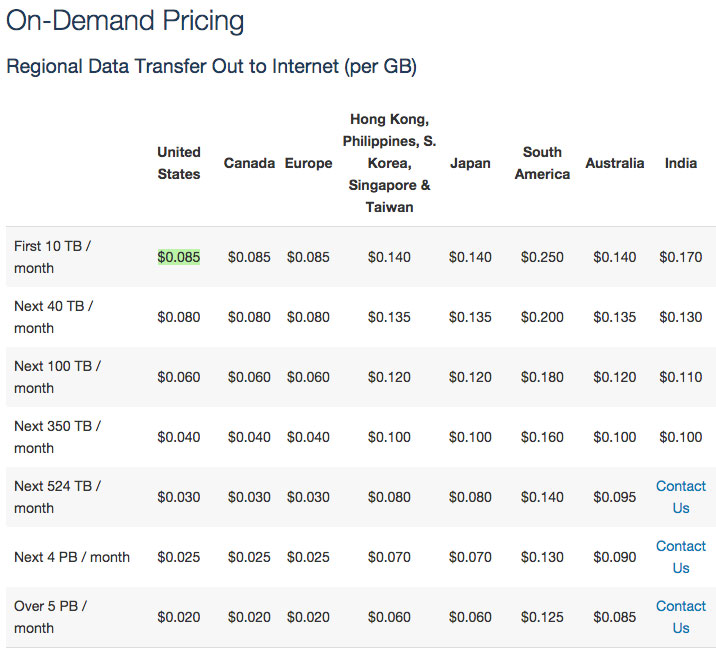
I spend a lot of time working with AWS already on cloud hosted apps, servers and databases, S3 etc -through the company I work for WholesaleBackup the makers of white label backup software. At WholesaleBackup We decided if we were going use a CDN service it must be integrated with our existing AWS stack and infrastructure. From what I’ve read the service is very cheap and it also allows for complete granular control while being centrally located with everything else we do at WholesaleBackup. So it’s primarily a business requirement but the pricing is amazing e.g.) 8.5 cents for 10TB in United States. Sweet!
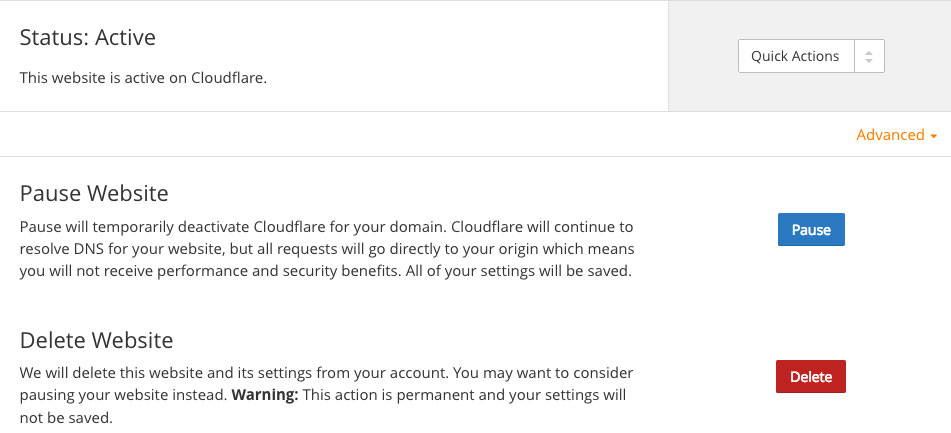
Sub steps: (please skip these 2 steps if you don’t have Cloudflare enabled)
How to disable free Cloudflare CDN services, so you can start using Amazon Cloudfront CDN
- Login to your DNS service and replace Nameservers entries that are using the Cloudflare CDN URLs with your own hosted server Nameservers entries.

- Login to Cloudflare and disable CDN services for your selected website, so it will longer attempt to take requests for your website. Look under Overview > Advanced click Delete.
Steps:
How to create CDN using AWS Cloudfront for WP Fastest Cache plugin
- If you have not already install the WP Fastest Cache Plugin.
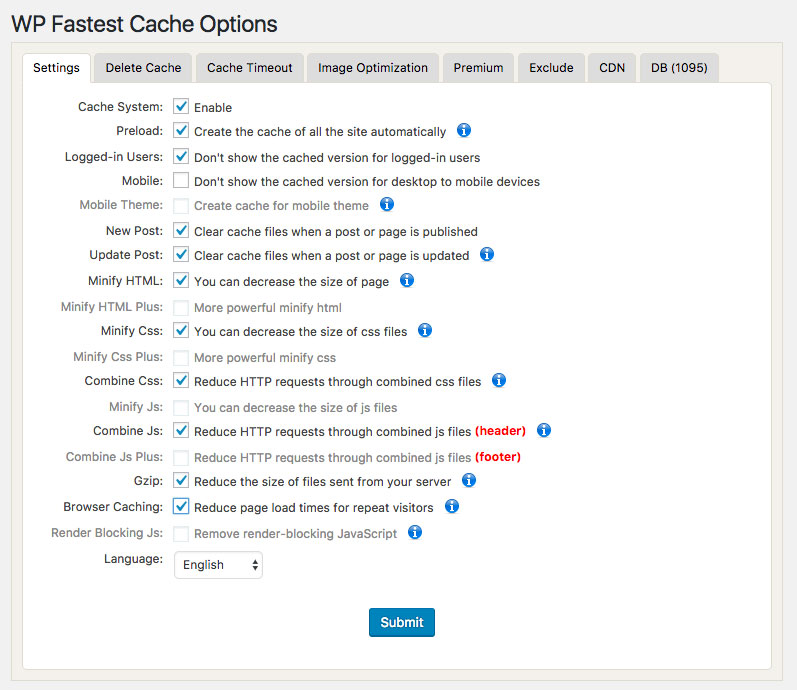
- Configure your default WP Fastest Cache settings on the plugin, please note these are my settings you can set yours up for whatever work best for your WordPress website.
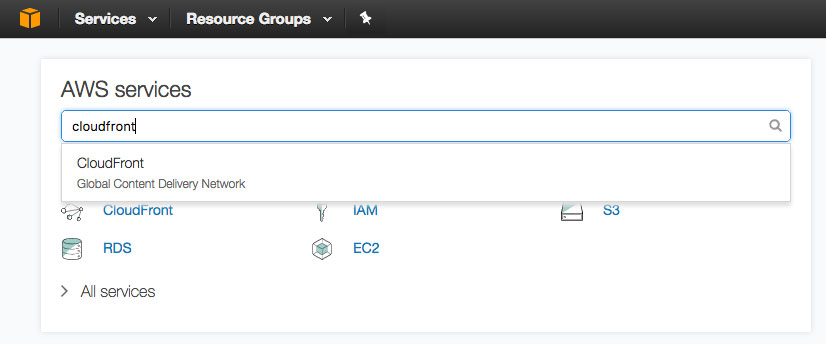
- Sign-in to your AWS Management Console, or sign-up to create your account if you don’t have one. (You might need to enable billing). In the AWS service services search prompt, enter or type Cloudfront and click to select the result that says Cloudfront – Global Content Delivery Network.
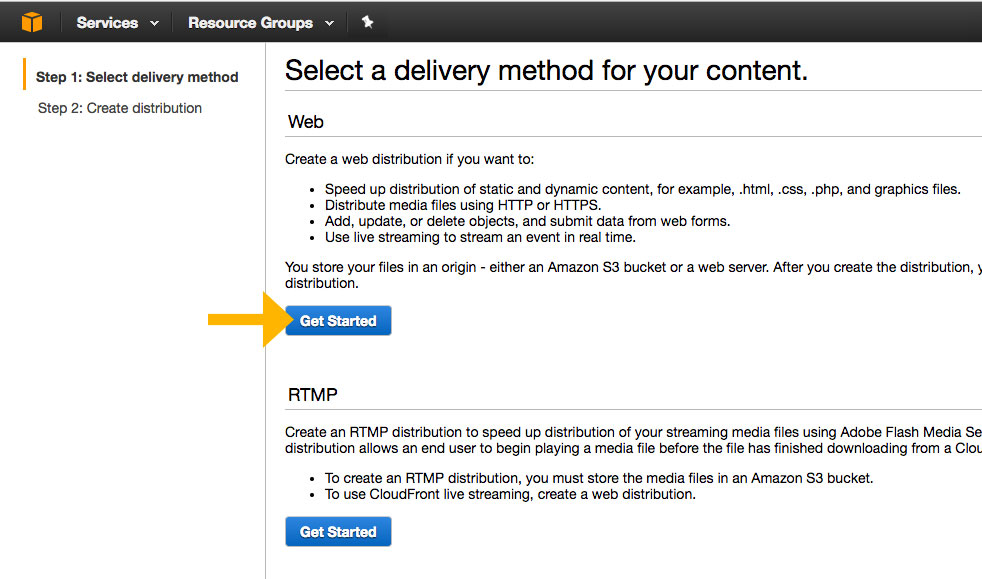
- Once you reach AWS Cloudfront services, click the Create Distribution (blue button)

- Select the first option to create a Web distribution to serve your website’s content, the second option is for streaming media, which is not covered here
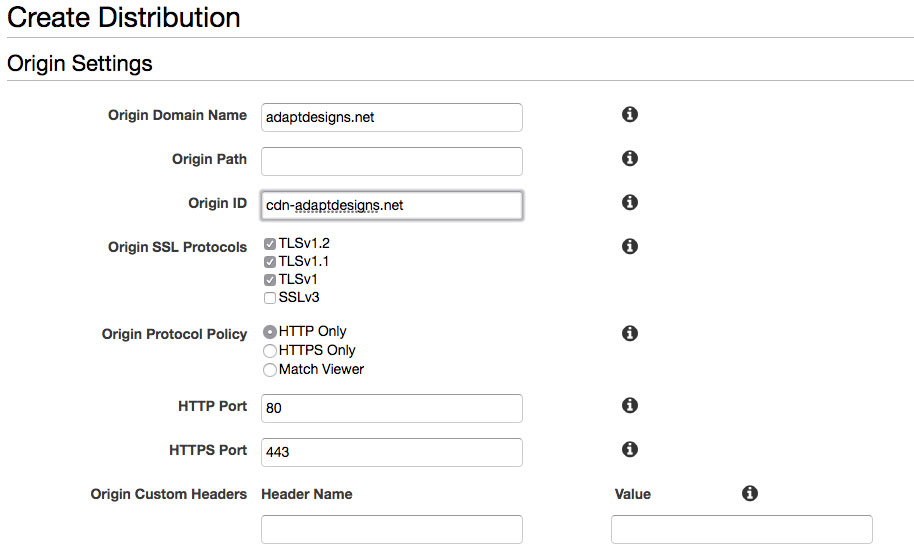
- Configure the Origin Setting for you Content Delivery Network – Origin name: [enter your website], Origin Path: [I leave it blank, or you enter a specific path to your assets here, please note the service uses the same read permission on your web server’s file system], Origin ID: [enter a simple descriptor of what this service is for] Origin SSL Protocols: [left mine defaulted], Origin Protocol Policy: [changed to Match Viewer], so when HTTPS is active on the site it will utilize the secure protocol methods.
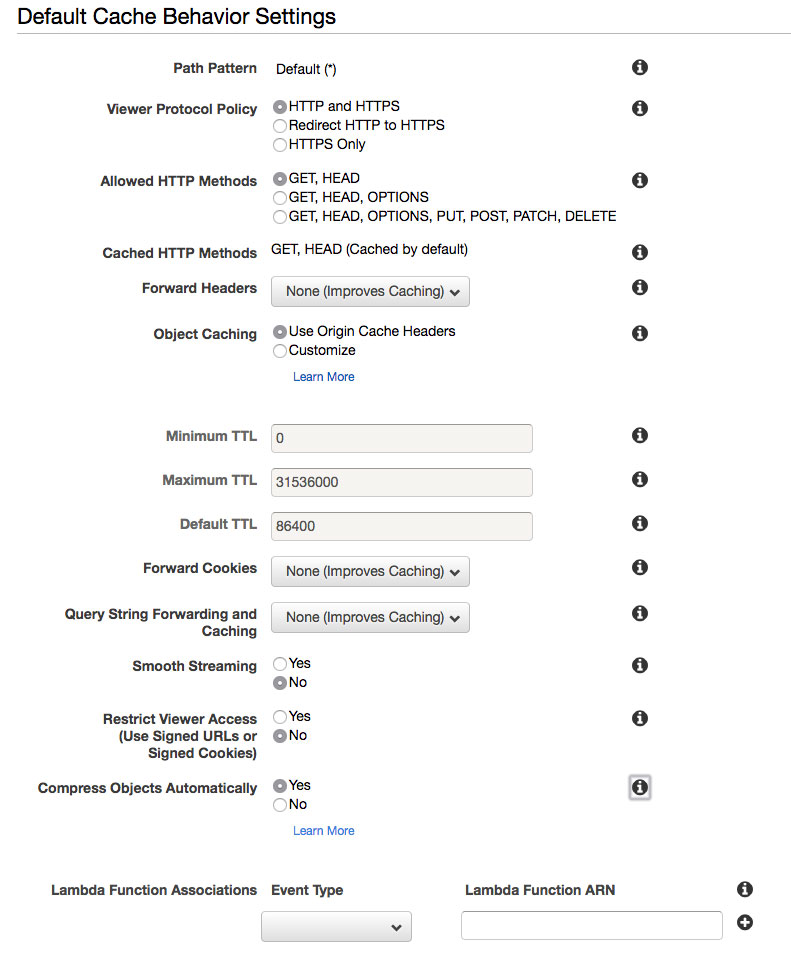
- Configure the Default Cache Behavior Settings – for almost all of these options I just left them at the default setting, except for Compress Objects Automatically, which I change from False to True, which will use GZIP compression on items whenever possible. Feel free to click on the info icons beside each option and change to whatever best suits your website’s requirements.
- Configure Distribution Settings – for the Price Class: I changed it to Use US, Canada and Europe, since it is cheaper and relative to my location and customers. On the Alternate Domain Names (CNAMES): I entered in a custom URL alias which I want to use for serving the content on, rather that the long-generated domain name that you will get from Cloudfront. This is completely optional, but I’ll include the steps for making your own branded Domain name using a CNAME for your Amazon CloudFront CDN service for those who are interested. All other options I left at the default settings. Next and finally – Click on the blue Create Distribution button to start building out your very own custom CDN services.
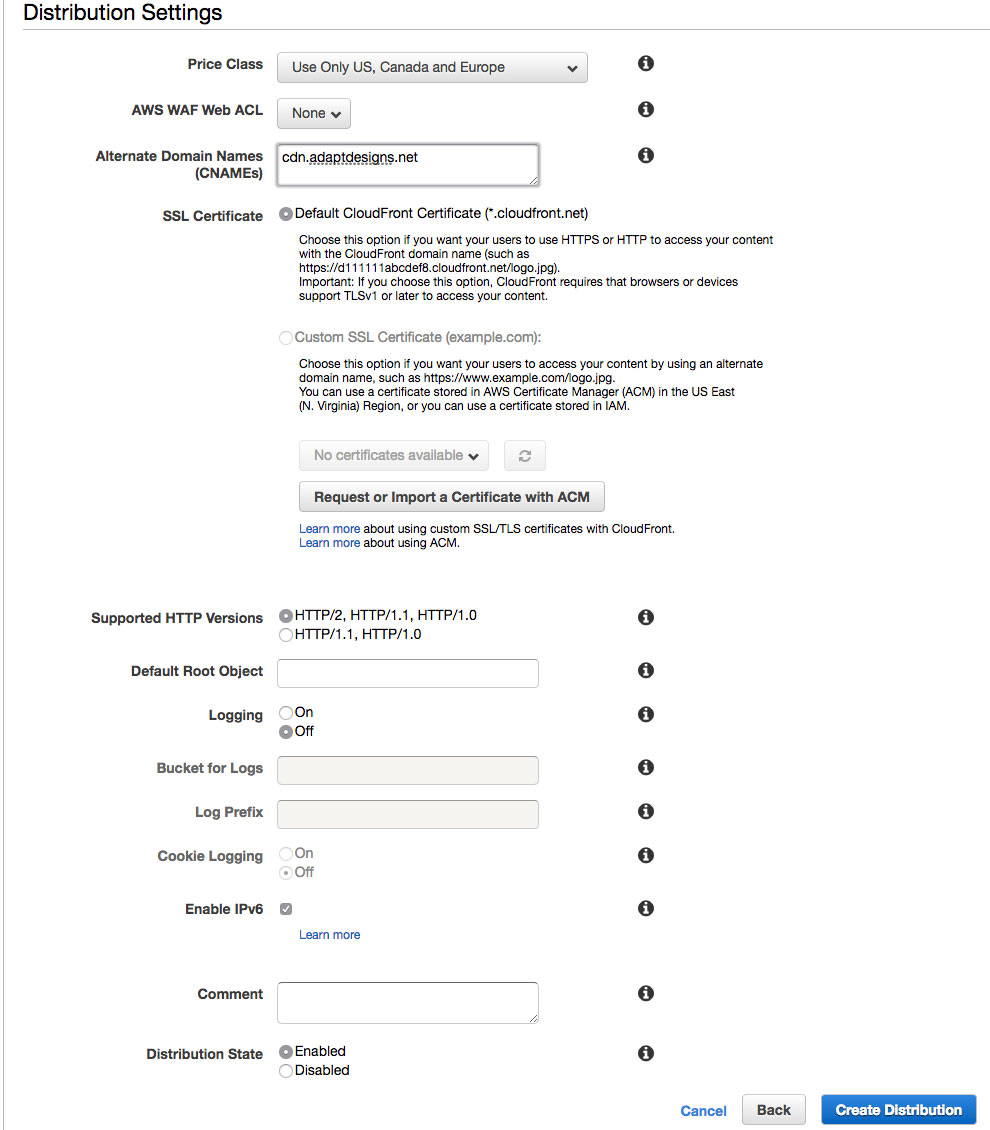
- The process will take around 10 minutes or more depending on how much content the service will upload and distribute throughout the AWS CloudFront CDN endpoint locations. This waiting time gives us a perfect opportunity to create the CNAME for our CloudFront CDN service, so you can have a nicely branded CDN URL. Or skip this step and move on to the final steps after it finishes.

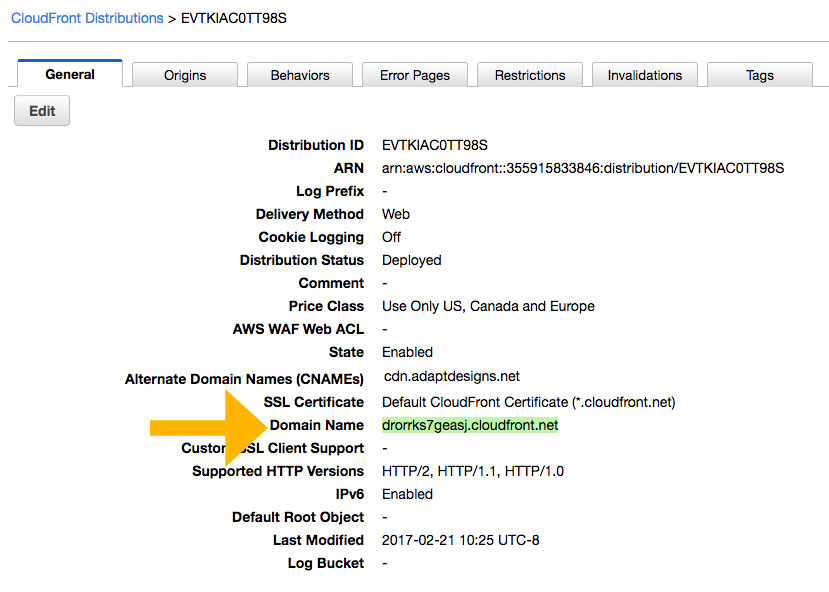
- Once the Cloudfront Distribution is completed with deploying, click on the ID (blue assigned link text), copy the Domain Name for your Cloudfront CDN, you will need this for entering into WP Fastest Cache CDN settings.
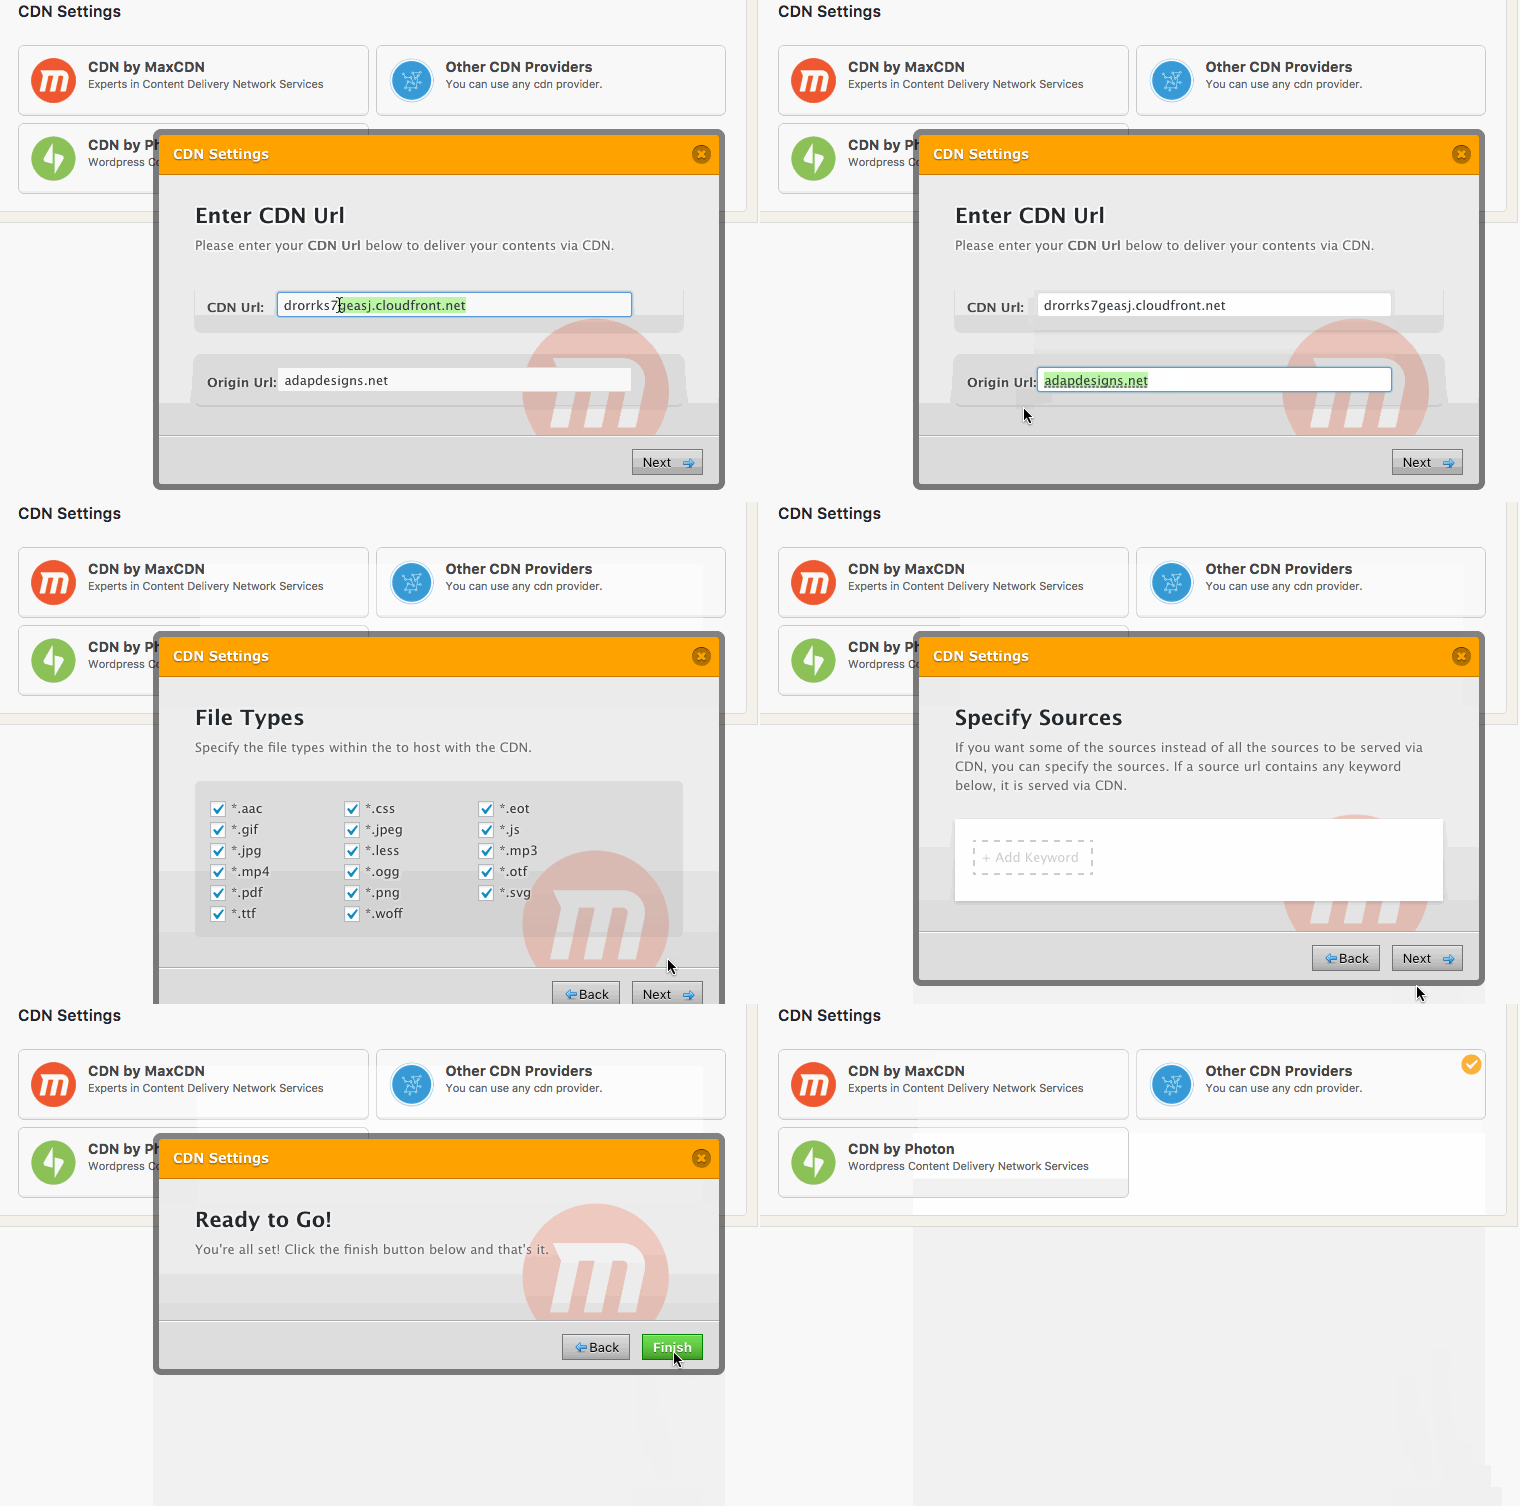
- Inside WP Fastest Cache Plugin settings navigate to the CDN options and select: Other CDN Providers, paste your new Cloudfront domain URL (or use your own branded CNAME) into the CDN URL field and also Enter your website’s URL for the Origin URL.
- At this point, the changes will not be immediately present in your websites source HTML. The plugin author has stated that “When you add the CDN, you need to clear cache and the files are then served via CDN. If you are logged-in, you cannot see it.” You can easily check to see that it will be working once WP Fastest Cache and Amazon Cloudfront finish syncing up. Run a quick test in order to ensure the CDN will work, go to your website select an image and open it in a new tab, then replace the hostname URL to use the Cloudfront domain URL (or your own custom branded CDN like we use in this example “cdn.adaptdesigns.net”), once you replace the hostname the image should persist, as it is now being delivered using your new CDN. Congrats you did it!
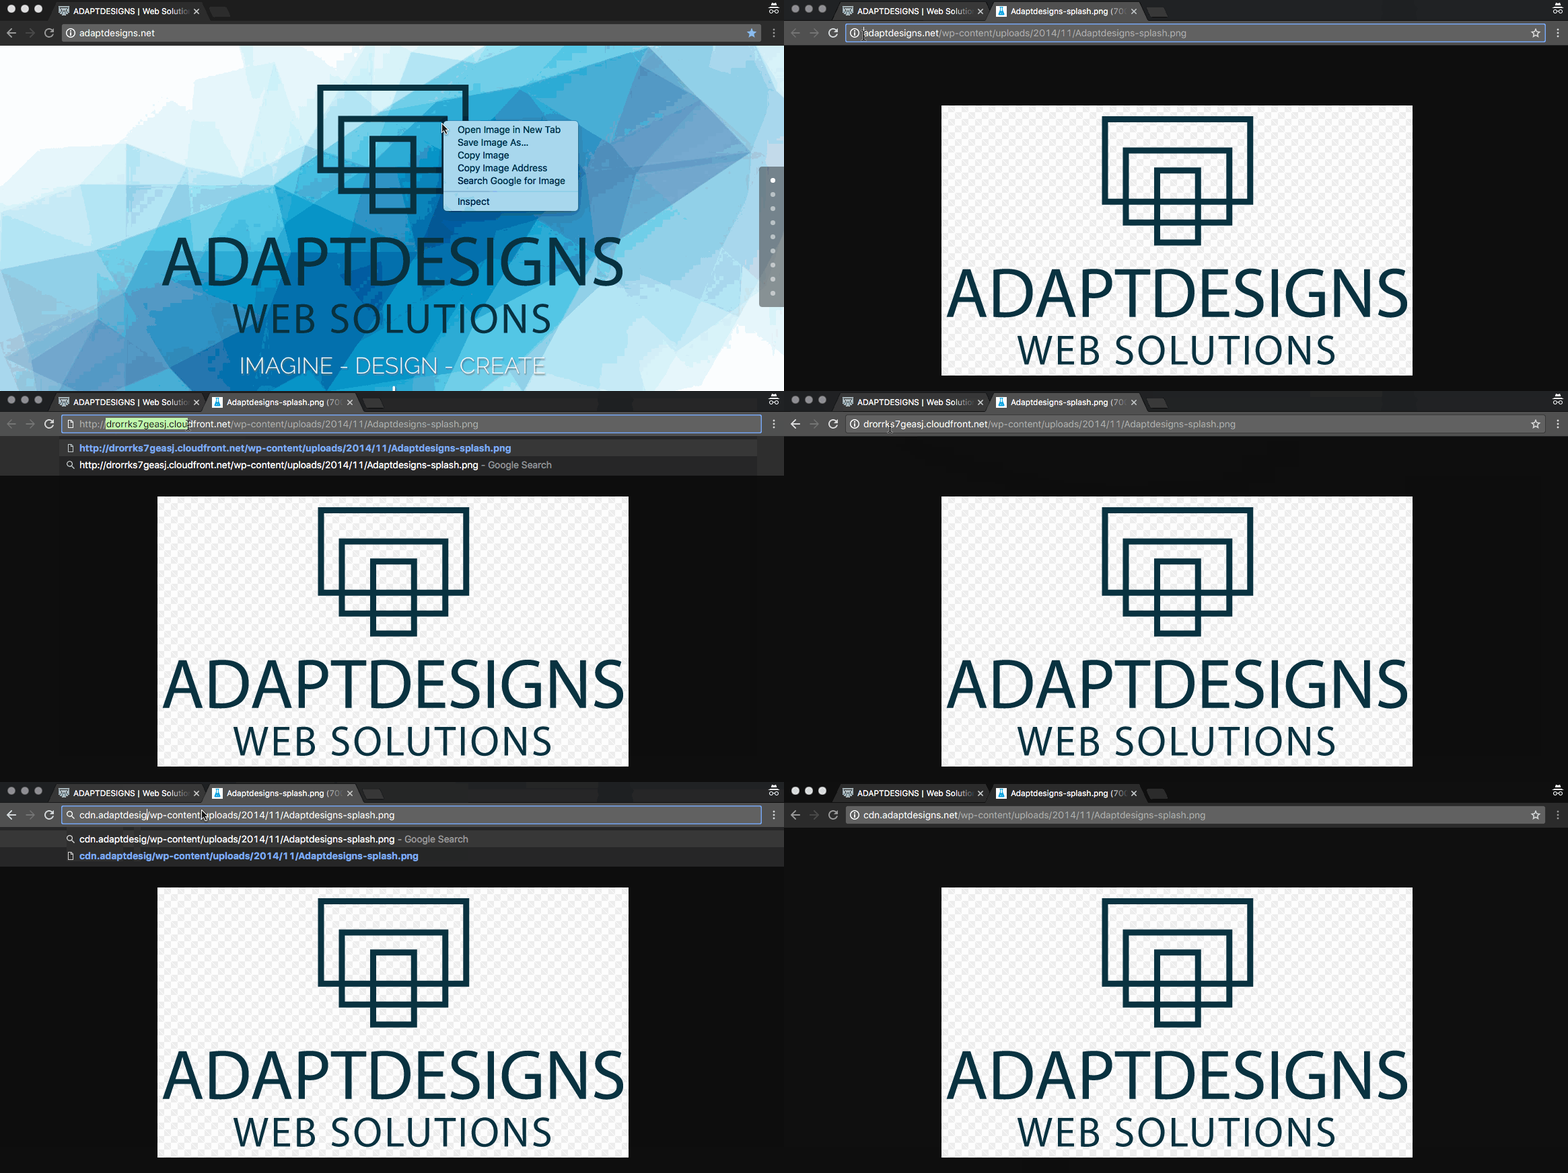
- How long will it take for my new CDN to be fully active? – As the plugin author indicated you need to delete the cache and not be signed-in to see the changes. During this specific case, it took around 2 or 3 hours until it was fully active and I was able to see the CDN being used in my sites source code when inspecting it, but it may be faster for you.

Summary and Results
In this case after using caching and the CDN service the website has improved its load time by 54%, lowered its request by 15%, lowered its total page size by 16%, and has increased 20% in the YSlow Score category, moving the site into the green for both PageSpeed Score and YSlow Score.
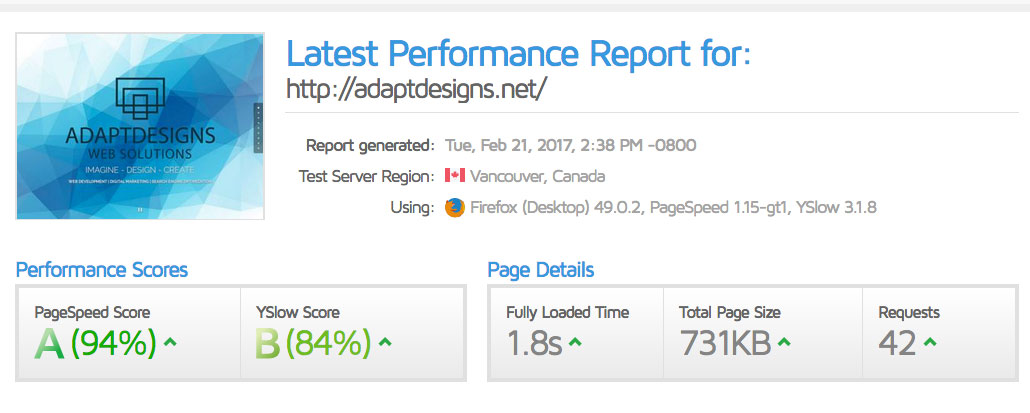
Performance results after using the plugin and CDN.
